
SET-UP
You cannot have a good golf swing without a good set-up. It’s fundamental to anyone who wants to start golfing or reach that next level. Even a good swing will not work with a bad set-up. With a bit of practice you can develop the set-up of a world class player.
- Jack Nicklaus: “If you set up correctly, there’s a good chance you’ll hit a reasonable shot, even if you make a mediocre swing. If you set up to the ball poorly, you’ll hit a lousy shot even if you make the greatest swing in the world.”
- David Leadbetter: “What invariably distinguishes a good player from a poor one is their respective address positions or setups.”
When I refer to set-up I mean:
- Grip.
- Posture
- Alignment
- Ball position,
- Distance from the ball
- Ball height (when teeing off).
- Pre-shot routine (the mental and physical aspect). I like to include it in the set-up because it is part of what you do before hitting the ball.
Today I’ll talk about the first three. The next three will be covered in the following newsletter, followed by the per-shot routine (physical and mental).
Grip:
Most important pre-swing fundamental. The following is for the right handed golfer. For lefties the opposite applies.
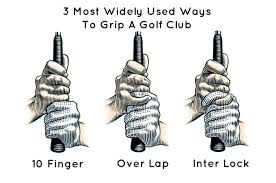
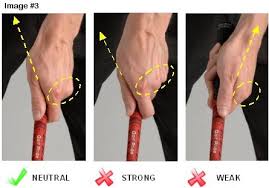
Any three ways to grip the club are perfectly acceptable. Those with smaller or weaker hands often use the 10-finger grip. The most popular is probably the inter lock.
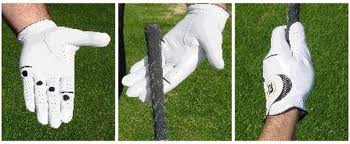
- The grip end should go under the heel pad and across the index finger.
- You should see two knuckles of your top hand.
- V points to right shoulder area. . No space between thumb and index
- Right hand matches left…facing each other…with left thumb in the palm of right
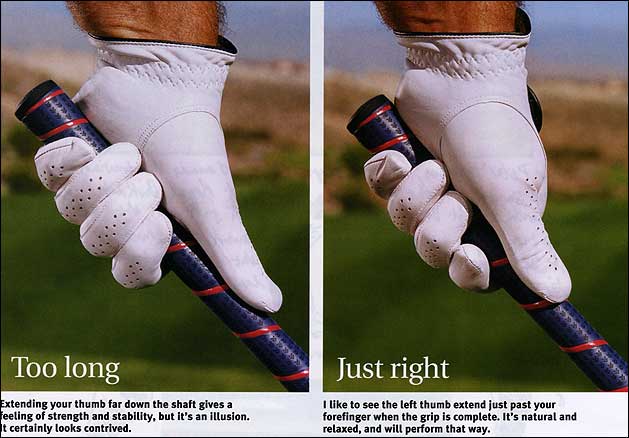
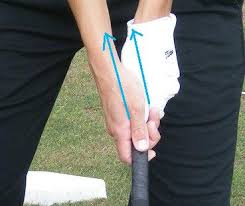
Strive for a short thumb, not a long one. This is one aspect of the grip which is seldom talked about.
The downside of a long thumb:
- A long thumb allows the club to shift into the palm of your top hand. A palm grip restricts hinging thus loosing clubhead speed.
- You will have less control at the top of the backswing. Good players rarely use a long thumb
A shorter thumb will have the following benefits:
- The club will rest more in the fingers where they should be.
- It allows your wrist to hinge properly, thus generating more clubhead speed.
- You will have better control of the club at the top of the back and more control is good.
Grip Pressure should be about a 5 on 10! Think of a drummer…how fast could he drum if he was stiff wristed and held on to the sticks too tight?
POSTURE
Posture:
- Bend at the hips while keeping back straight. The picture on the left above is the proper position. How much do your bend? Tap your knee cap with the tip of your fingers
- To check the right amount of bend at the hips take your posture, release the club with your right hand and place it on your right leg, it should touch the top of your knee cap.
- Notice the “slight” flex in the knees.
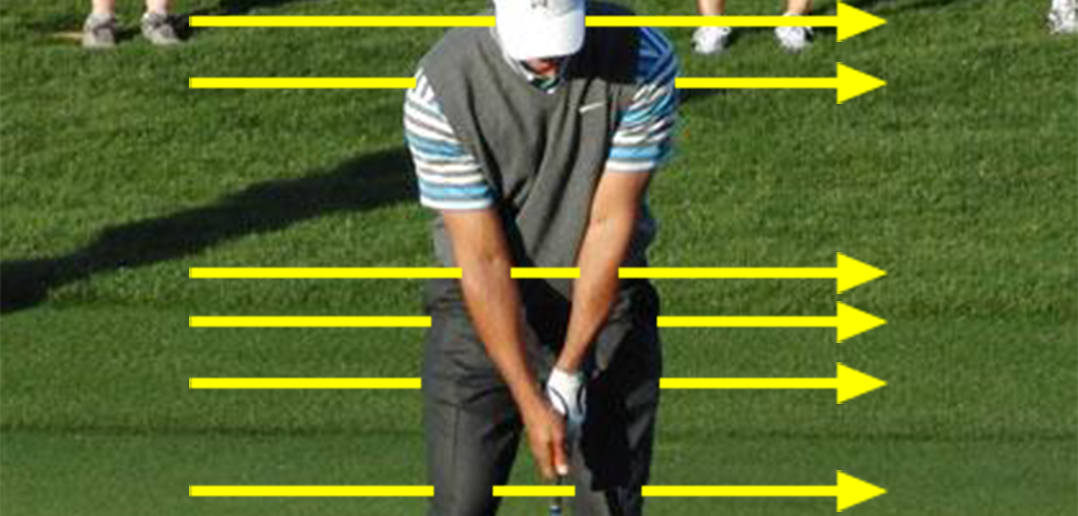
- Body must be square to the target: feet, knees, hips, shoulders, arms and eyes are parallel to the target line.
- Arms are in front of body and hanging from shoulders. Hands should be directly underneath the shoulders.
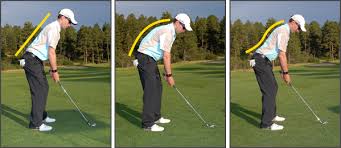
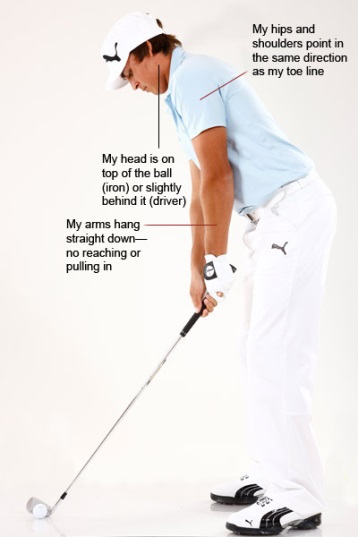
- The left diagram of Rickie Fowler states that the head is on top of the ball. As you can see the head is not on top of the ball…so forget that tip.
- Feet are approximately shoulder width apart with the weight distributed about 50-50 between the left and right side.
- Notice Rickie flares out his right foot. It’s ok to flare out the right foot as well…especially if you have less flexibility; a flared right foot will encourage a better hip turn on the back swing.
- I’d like you to notice the lack of tension in Rickie Fowler’s set-up. This is VERY important! LESS IS MORE! Less tension produces a more fluid swing. A fluid swing produces more power with less effort. Just think of the best drive you’ve ever had. Were you trying to hit it hard with tensed up muscles?
Alignment
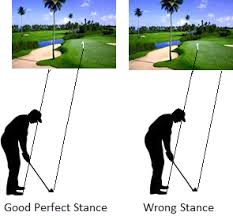
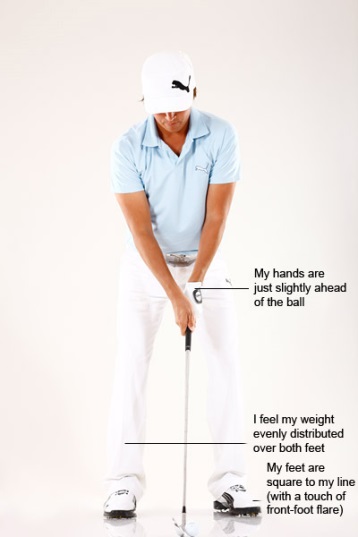
Align your body parallel and left of the target line. Don’t align your body to the target as in the picture on the right.
- Align your feet, hips and shoulders parallel to the target line. I often see the shoulders pointing to the left of where the feet are pointing. That’s because the feet are pointing at the target and the golfer re-adjusts the shoulders to be parallel to the target.
- Use an intermediate target. It’s easier to aim for a spot a few feet away than a target that is 150 yards away. The first thing to do is aim the clubface directly at your intermediate target making sure the clubface is perpendicular to the target line. Then align your body parallel to that imaginary line.
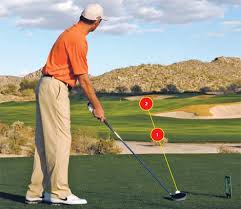
Always use alignment sticks or clubs when practicing…one pointing at the target and the other pointing parallel left. This will train your eye and body to be in the proper position.
REMEMBER: IF YOU AIM POORLY YOU HAVE TO MAKE A BAD SWING TO HIT A GOOD SHOT
Contact Jacques by email
[email protected]
or 204-470-3262